Showing posts with label Tutorials. Show all posts

Thursday, December 10, 2009

Comments on Blogs with Templates Installed

A number of you have been having trouble with the comments feature on your student's blogs being disabled once students install templates from the internet.

Matticus, a student in Liz Daigle's class at Greenbrier East High School, has used his masterful tinkering skills to solve this problem and drafted a step-by-step guide for the Globaloria community:

1. After signing in, choose the layout option

2. Click the Edit HTML tab

3. Scroll to the bottom of the window

4. Click Revert widget templates to default

5. A pop-up window will appear, click OK

6. The layout should save and the problem should be solved (I recommend checking this to be 100% sure)

Hope that helps you all! Please contact comment or e-mail me at rachel@worldwideworkshop.org if you need more help!

Your GB,
Rachel

Monday, September 14, 2009

Tutorial on Embedding Your .swf Files in Blogger

Greetings Globaloria educators! Today I have a special guest post for you all from Matt Payne on embedding .swf files in blogger. This is a great way to highlight your student's work, or encourage them to share some of their files. Thanks Matt for all your help! Take it away:

Hey there bloggers! This is Matt aka Banditt from Southern WVCTC. Here's a quick “How To” I made on posting your flash flies in blogger:

Step 1: Log in to your wiki and upload your file. Once you have uploaded it you should arrive at a screen similar to this.
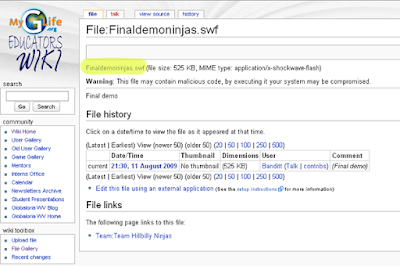

Step 2: Now you have 2 choices. You can click the link I have highlighted in the above picture and load your swf and get the url or right click the link and copy the link address (this may vary depending on the browser you use). If you don’t know what I’m talking about just click the link and load your flash file.

Step 3: Highlight and copy all of the text that is in the address bar on your browser. I’ve highlighted mine in the below pic.
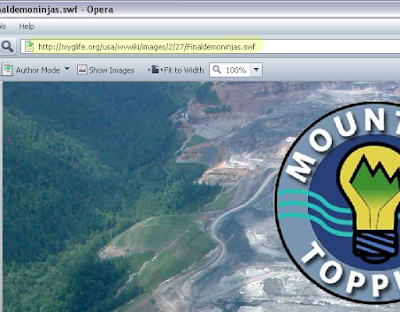

Step 4: Log in to Blogger and begin a new post.

Step 5: Use the embed tag to place the swf file on your blog post just as I have done in the picture.

<embed src="http://myglife.org/usa/wvwiki/images/2/27/Finaldemoninjas.swf"></embed>
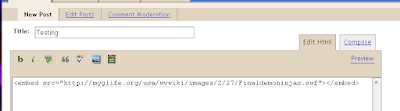


Step 6: Preview your post to see if it works, then go ahead and click “Publish”.

Step 7: If you forget to close an html tag in Blogger, it gets all feisty and starts throwing error codes because it doesn’t like what you’ve written. Most of the time you can just check the box to stop show errors and everything will work fine. Other times you may need to go back and correct yourself.
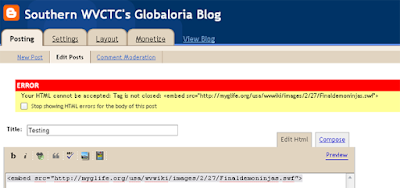

If you have done it correctly you should be rewarded with a small version of your swf embedded within your Blogger post.
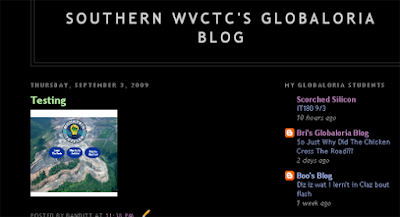

Why did it not show it at the full size you ask? Blogger automatically sizes it to fit in the small table area it creates just for your post.

Is there a way to make it bigger? Yes: you can add to your embed tag the width and height attributes. Example (in red):

<embed src="http://myglife.org/usa/wvwiki/images/2/27/Finaldemoninjas.swf" width="400" height="300"></embed>

And what you end up with is a swf that you can tailor the size to about whatever you would like.
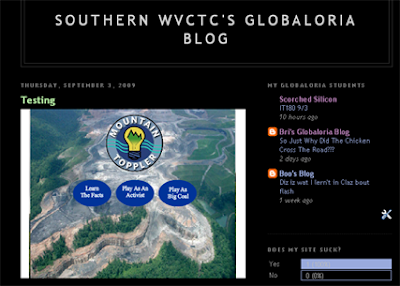

If you want to tailor the embed tag even more (different background colors etc.) visit http://www.apple.com/quicktime/tutorials/embed2.html for a little more help.

Good luck!
-Matt

Friday, January 18, 2008

Instructor Tutorials: A How to Movie on Flash

Yesterday I highlighted a tutorial developed by a Globaloria student. Today, I wanted to point out that you can also get a lot of Flash resources from the Instructors. Here is a video tutorial on how to create a button in Flash. It was built by Patrick Smith at MCTC and posted on his wiki page.

Thursday, January 17, 2008

Education of the Students, For the Students, By The Students

The title might be a little hookey, but it kind of captures the idea of what we are going for here. Yeager33 at MCTC actually "jumped into" Action Script 3 for flash. He worked through the approach and decided to create his own tutorial and share it on the wiki.

This is the first one.

Displaying a Block

  • 1. Open a new Flashfile(ActionScript 3.0)
  • 2. Create a rectangle and convert it to a movieclip
   Using the Rectangle tool create a new rectangle,Use selection tool and group the rectangle together
Right click the rectangle and select Convert to Symbol..
In the Convert to Symbol dialog box Enter Block in the Name: textfield
Select the radio button for Movie Clip
Click the Advanced button
Under Linkage select the Export for ActionScript checkbox
(this will also check the Export in first frame button Leave it checked)
Click Ok
ActionScript Class warning message box will pop up Select Ok

After converting to symbol make sure your stage is clear

  • 3. ActionScript Code

Select frame 1 right click and select Actions from drop down menu or press F9 to open Actions window In the Actions window type

  import flash.display.*;
import flash.events.Event;

This basically lets flash know that we will be working with display objects and events so it can load the code to handle these things.

  • Next we want to define a variable to represent our display object in this case the block we created
  var myBlock:DisplayObject= new Block()
  • At this point we have a variable(myBlock) representing our display object


We can now use ActionScript to alter the display object properties of our variable Let us set the starting point for myBlock before we draw it to the screen

 myBlock.x=300
myBlock.y=200
  • Now we create myBlock on screen
this.addChild(myBlock)
  • Publish preview and you should now have a block sitting on screen at the (X,Y) position that you specified.

This may not seem like much right now, however we now have the ability to change properties of our object with ActionScript code

Go check out his page for the others.